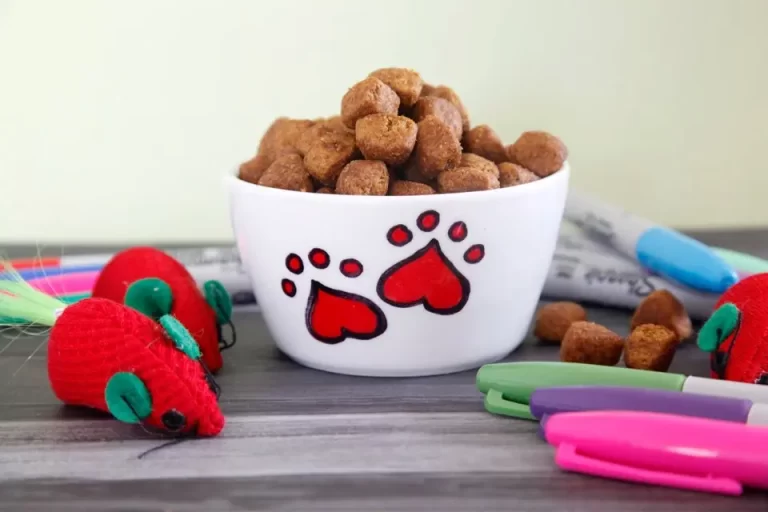
Decorating your pet’s bowls can add a personalized touch to their feeding area. Here’s a step-by-step guide on how to DIY decorate pet bowls:
Materials Needed:
- Plain pet bowls (ceramic or stainless steel work well)
- Non-toxic paint suitable for ceramics or metals
- Paintbrushes
- Painter’s tape or stencils (optional)
- Clear sealant or varnish (optional)
Instructions:
1. Clean the Bowls:
- Start by thoroughly cleaning the pet bowls with soap and water. Ensure they are completely dry before starting the decoration process.
2. Choose a Design or Pattern:
- Decide on the design or pattern you want to paint on the bowls. This could be your pet’s name, paw prints, geometric shapes, or any other creative ideas you have in mind.
- Use painter’s tape or stencils if you prefer a more structured design or to create clean lines.
3. Paint the Design:
- Using the non-toxic paint and paintbrushes, carefully paint the chosen design onto the pet bowls. Take your time and use multiple thin coats if needed for vibrant colors.
- Allow each coat of paint to dry completely before applying the next layer to prevent smudging or mixing of colors.
4. Add Details and Accents:
- Once the base design is complete and dry, add any additional details or accents to enhance the appearance. For example, outline the design with a different color or add small embellishments like dots or patterns.
5. Allow the Paint to Dry Thoroughly:
- After finishing the design and any added details, let the painted bowls dry completely. This might take several hours or as per the paint manufacturer’s instructions.
6. Apply Sealant (Optional):
- To protect the painted design from wear and tear, consider applying a clear sealant or varnish over the painted surface once it’s fully dry. This will help preserve the artwork and make the bowls more durable.
7. Cure or Set the Paint (if needed):
- Some types of paint may require curing or setting. Follow the instructions provided with the paint to bake the bowls in an oven or use a curing method if necessary to ensure the paint adheres properly.
8. Test for Safety:
- Before using the bowls for your pet’s food or water, ensure that the paint and sealant used are pet-safe and non-toxic. Allow enough time for any sealant or varnish to completely dry and air out.
9. Introduce the Decorated Bowls to Your Pet:
- Once the bowls are completely dry and safe for use, introduce them to your pet’s feeding routine and enjoy their personalized, decorated bowls!
By following these steps, you can create beautifully decorated pet bowls that reflect your creativity and add a special touch to your furry friend’s dining experience.


